In the past couple of weeks, it’s become hot. Summer hot.
And that means when we head out for a hike, we’ll look more favorably on trails that have water as a main feature. Just enough to cool our feet in, maybe splash some water in our face. Trouble is, you can’t always choose how much water you get. When that happens, when your trail comes across a stream or creek without a bridge or an obvious way to get across, you need a strategy for a safe crossing.
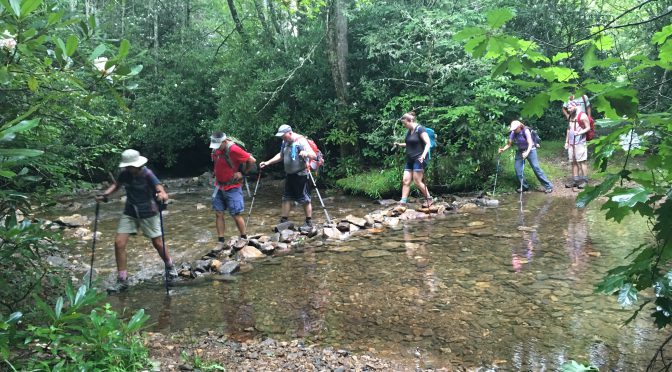
A stream with no bridge or obvious rock-hop crossing can be intimidating to the unprepared hiker. Just the thought of getting your feet wet and continuing on in soggy boots seems capable of raising blisters. Fortunately, most rivers can be easily forded. Here’s how:
Footwear. If you know you will be dealing with multiple crossings in a short span, slip into a water shoe. Keens (or anything that’s similarly constructed) are ideal, with their closed toe and firm fit. Old running shoes also work, though they don’t dry as quickly. If it’s just a crossing or two, walking across in hiking socks (preferably wool) provides a bit of protection to your feet and improves grip.
Trekking poles (or at least a hiking stick). Your balance crossing water is greatly improved if you have trekking poles or a hiking stick: three or four points of contact beats two. Probe with your poles/stick, plant firmly, take a step. If you don’t have poles or a stick, you can often find one leaning against a tree or rock at the crossing.
Scout the crossing
Don’t be hasty, it’s a several step process:
- First, check the opposite bank and see where the trail resumes. Often, the direct line across is where you’ll find the logical crossing, but not always: water levels in particular can impact the best place to cross.
- Check to see if there is a viable rock-hop.
- Generally, the widest spot in the river — where the water is often shallower and the current not as strong, is the best place to cross.
- Look for a worn path headed either upstream or down. Odds are it leads to a preferred crossing.
- In general, slow moving water shouldn’t be above your thigh, fast moving above your knee. If it is, scout upstream and down for another location.
- Look for large rocks or other obstacles in the stream; they create an eddy (slow moving water) behind them, making for a good spot to rest and catch your breath before continuing on.
The crossing
Again, take your time …
- As you wade in, face upstream, leaning slightly into the current. Take a slight angle downstream.
- Don’t hurry. Make sure every pole and foot plant is secure before applying full weight.
- Always maintain at least two points of contact (again, why you need poles or a stick).
- If you’re with another person, try linking arms and crossing. Ideally, the heavier person is first and slightly upstream, creating an obstacle for the second hiker.
- If you fall, try to fall forward, or upstream; if you’re in fast-moving water and are swept downstream, dump your pack and point your feet downstream: better your feet hit any downstream objects than your head.
Post crossing
- Dry your feet, regardless of whether you’re continuing on in river shoes or putting on socks and boots. Blisters are no fun.
Summer’s a good time to practice your water crossing skills. You fall and the worst that happens is you get wet. And that’s not a bad thing when it’s 90 degrees.
Learn more
This is an abbreviated version of our GetBackpacking! Guide to Water Crossings tip sheet. For additional help on navigating tricky crossings, check out our guide at our GetGoingNC store, here.